
CentOS 7.2 Step by Step Installation Guide with Snapshot
CentOS 7 as compared with CentOS 6.X are listed below :
- CentOS 7 uses XFS as its default file system.
- OpenJDK-7 is the default JDK.
- initd has been replaced by systemd.
- New Linux Kernel 3.10.0, support for Linux Containers, and the inclusion of the Open VMware Tools and 3D graphics drivers out of the box.
- Change in the numbering Scheme, Official release is Centos 7.0-1406 , where as 7 Comes from RHEL 7 and 1406 shows release date (June 2014).
In this article we will go through the CentOS 7 Installations steps with screenshots.
Step:1 First Download the .iso file from the CentOS website, burn it onto the disc. Boot your PC from DVD.
Use this link to Download CentOS 7 ( 64 bit)
Step:2 Choose ‘Install CentOS 7‘ option and press enter.
Use this link to Download CentOS 7 ( 64 bit)
Step:2 Choose ‘Install CentOS 7‘ option and press enter.


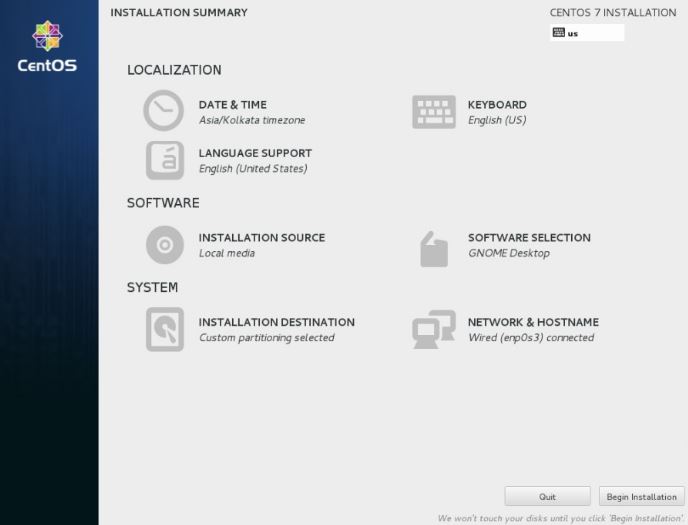
As you can see below i already have around 30 GB hard drive to use for OS installation. Choose ‘I will configure partitioning‘ then click Done.


click on Accept changes !

Step 6 : Configure Networking and Set the hostname .

Step 7 :Now this is Software Selection Tab. Select the Software that you want to install. Click on “Software Selection“.

Step 8 : Now everything is Done and we can start installation now click on begin installation.
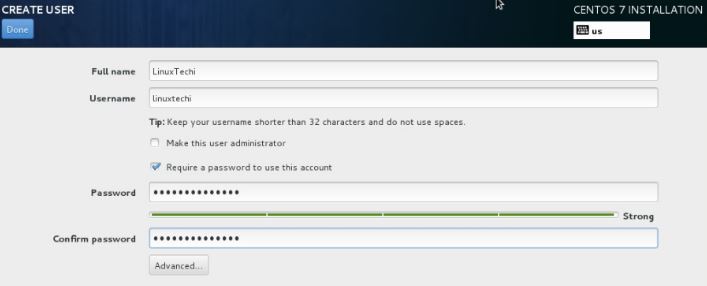
Step 9 : Now we can set password for "root"

Step 11 : Now installation is in process so we need to wait till process complete.

Step 12 : Now installation is in process so we need to wait till process complete.

Step 13 : As its our first time to login on new installed CentOS so we need to accept "EULA agreement"

Now we will see below windows its all done and now we can enjoy.

Hope Article will help you ! You can like it.. share it.. or
comment on it..


No comments: